
Tracks
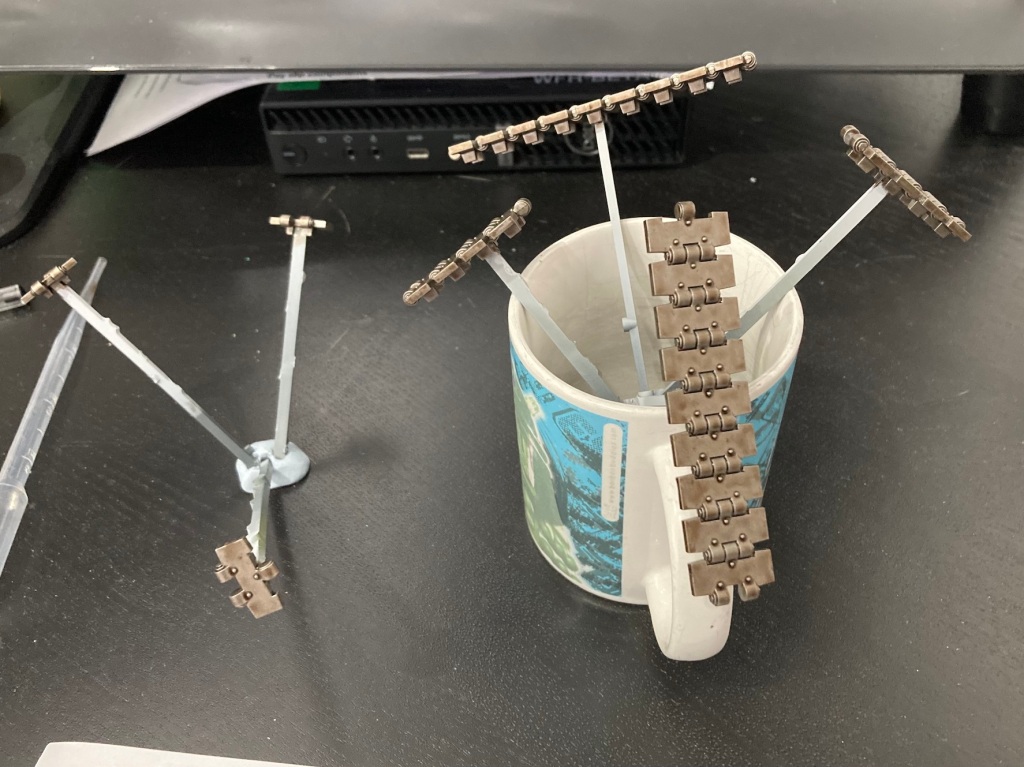
The tracks were dealt with one side at a time. Each piece was cut, cleaned up and then mounted onto bits of sprue using superglue. They could then be undercoated with white spray and painted. When complete they were snapped off the sprue and then the unpainted bit painted by hand quickly. This all worked well enough, I could easily paint all the nooks and crannies on the tracks and then glue them into place with superglue (as plastic liquid poly need the paint cleaned away).
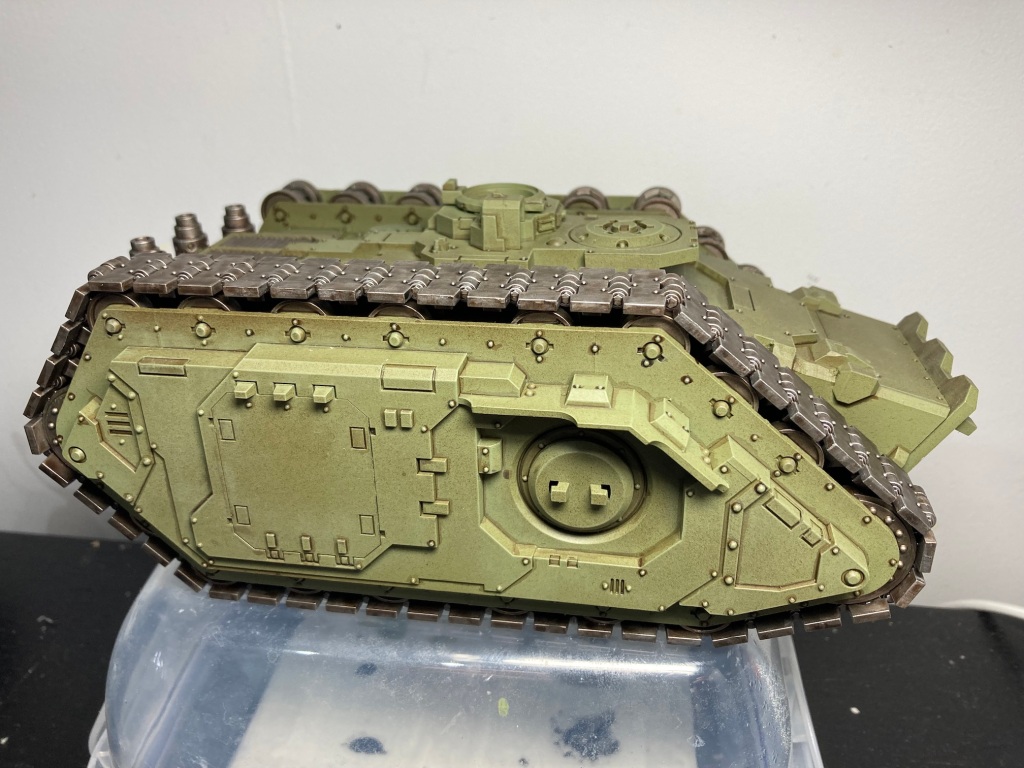
One important thing that did happen here was that I removed the Spotlight and Smoke Launcher that I had attached to the hull. I hadn’t left enough room for the tracks to fit on, they were far too close and it looked “wrong”. So I cut off the attachments and painted over where they had been.
Transfers


I’d used transfers before and thought that the looked far too clean, they don’t look like a part of the vehicle. My solution to this was to try stippling the transfer with Death Guard green paint so as to make it look faded. I had tried this before with one on my Helbrutes and liked it, I think it works well.
Rusting


The metal parts were all rusted and then I gradually rusted the hull. I rusted small areas along the edges of panels to try and suggest wear and tear.
Must and Rust Streaks

I’ve been experimenting with Dirty Down Rust but just can’t get it working as good as other people seem to be able to produce. One thing I have found it good for though is streaking rust stains. I make sure that it gets a damn good shake, I’ve got two mixer balls in the bottle, and get it nice and warm and then streak away.
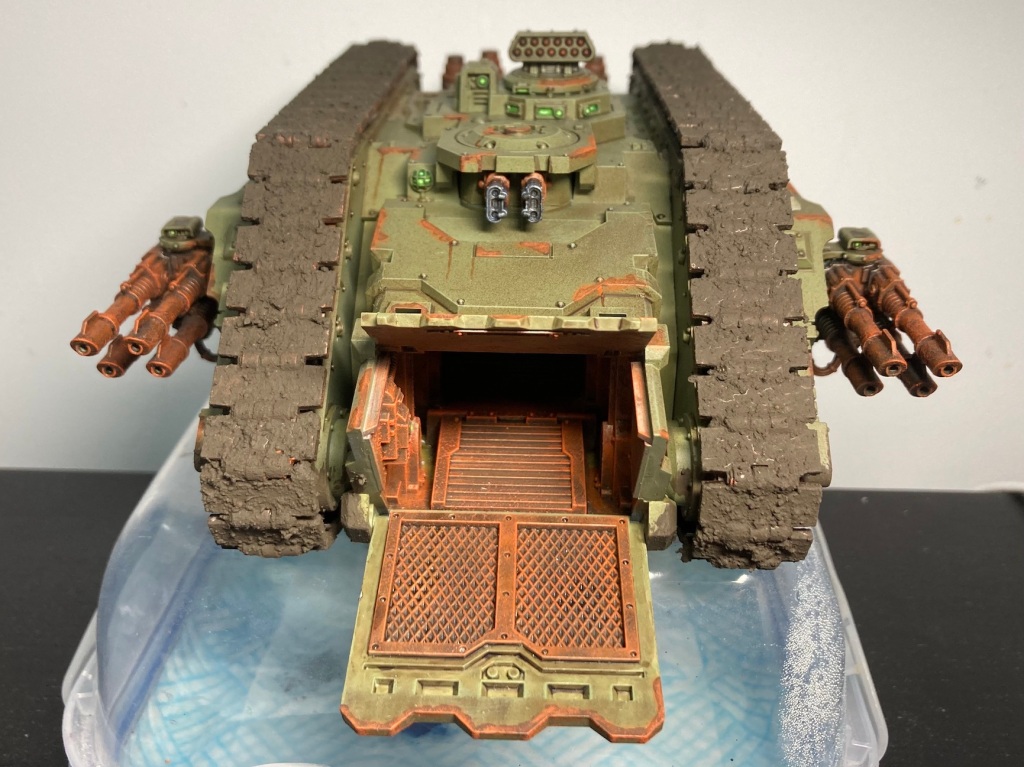
For the mud I used AK Terrain’s Muddy Ground. You can get a massive tub of it for around about £10. I think that I used far too much on the tracks, that much mud should have much more mud on the hull which I didn’t want. But I do like it, I just want less of it. I’ll use it on my next project.
Hull Guns and Lights

I did consider magnetising the hull weapons, but I just couldn’t see an easy way of getting it solid enough. So instead I went for the flamers. This allowed me to also try some heat burn effects. I didn’t rust the flamers all the way to the end, I left most of the final tip as metal. Then working from the back to the tip I applied applied a ring of Seraphim Sepia, then one of Druichi Violet and finally one of thinned Alatoic Blue. I think it works nicely enough and adds some colour to the model.
The lights were painted with a base of Moot Green, a wash of Biel-Tan Green and then dot highlights of Moot Green mixed with White.
Conclusions
- The Spartan was a really nice kit to build. The underside of the hull was the only slightly tricky bit, other than that it all lines up nicely.
- If you are going to apply accessories like the smoke launcher to the hull then do it after you’ve fitted the tracks.
- Go easy on the mud!
- My airbrushing skills leave a lot to be desired, looking at some of these very up close photos is quite painful.
- The kit is really aimed at the Horus Heresy game and not at 40k. So it comes with a lot of options that, as of 9th Edition, you just can’t use in 40k.
Previous Stages
Spartan Assault Tank Part 1 – Front Ramp
